


Music recording and producing has become very accessible over the last 2 decades, with improved technology and decreased cost, but where do you start? What equipment do you need? What does everything do? This guide will aim to answer these questions so you can quickly and easily start up your own home studio with confidence.
Computer
If you’re reading this there’s a chance you are doing so on your computer. Before you think about anything else, please ensure your computer is up to the task of handling your software and hardware. DAWs (Digital Audio Workstations) will be covered in the next section, however please read the minimum requirements for your DAW of choice to ensure you have a compatible operating system and specifications.
DAW’s
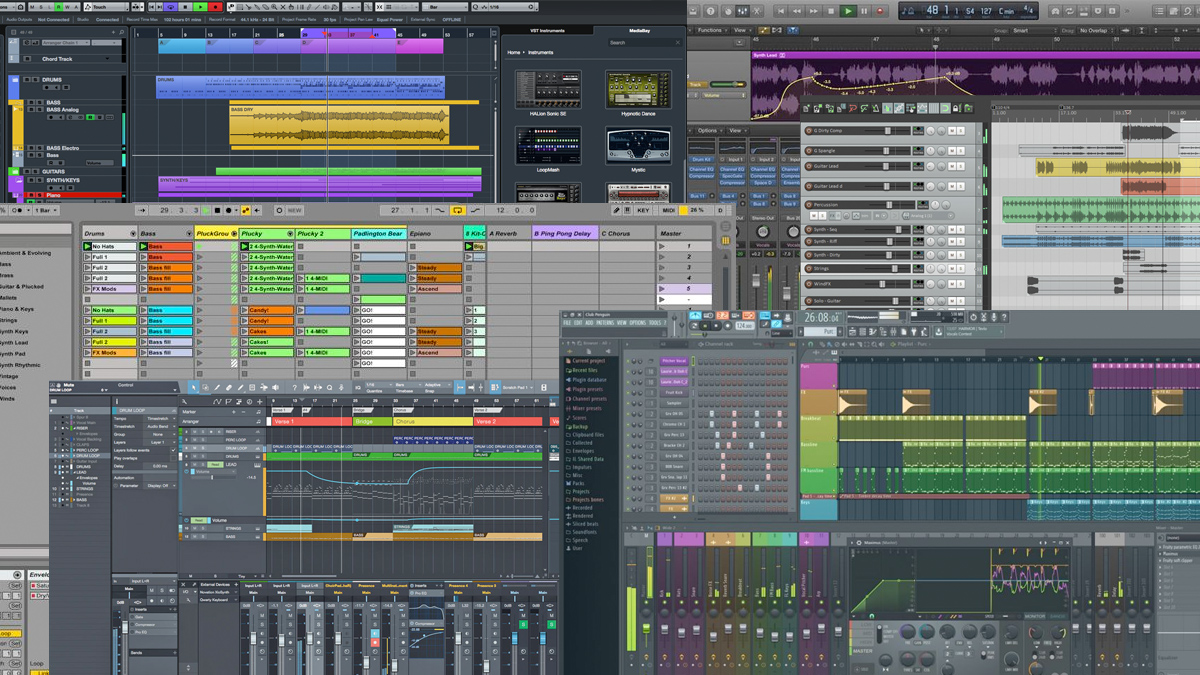
A DAW or Digital Audio Workstation is where you will record, mix and edit your audio. There are a plethora of DAW’s on the market, and while they all look and behave differently, they all essentially do the same thing.
Within your DAW, you can record audio, lay down virtual instrument tracks, add effects, trim unwanted sections, remove bad takes, and some even have the ability to edit to video. In a nutshell, you edit your sound to get it exactly how you want.
Each DAW behaves differently, and some are more suited to certain aspects of audio production. For example, Pro Tools is geared to live recording and post production, Ableton Live is geared towards electronic music and live performance, and Cubase is kind of a ‘jack of all trades’.
There are free DAWs available such as Audacity, however these are limited in functionality and content. This may prove useful for your very first recording session, but to really get to grips with professional recording software it’s worth investing in a paid product. While the full version of most DAWs are quite costly, there are stripped down versions of the same product, at a much cheaper price. Once good example of this is Sonar Home Studio. At £39 you get a lot for your money, such as effects, virtual instruments and samples.
It will take time, and a lot of trial and error to find a DAW suited for you, however once you understand the basic controls and terminology, it will simply come down to a matter of personal preference.
Other introductory DAWs include:
Audio Interface

An audio interface is a device which lets you record into your computer – think of it like a bridge between your instrument and DAW.
Most audio interfaces allow you to plug in a microphone via XLR input, or an instrument such as a guitar via a 1/4” jack, and connects to your computer via USB. These are also used to connect your monitors and your headphones, and gives you control over all aspects including input gain and output level.
Where each brand/model of audio interface differs is the sound processing, functionality, and build quality. Higher-end interfaces will sound marginally better, usually offer more than two inputs, and sometimes include LED metering to name a few features. Having stated that, interfaces have become so well made nowadays that even lower-end models can provide a clean, high-quality sound. You can hear this for yourself by searching for your model on YouTube.
For starting out with recording, you will most likely only need two inputs – you will only be tracking one instrument at a time, and this will allow you to record in stereo with two microphones at a time if you wish. Some interfaces also allow for MIDI input, which you can use to connect a keyboard.
When setting up an interface, it’s important to check for any drivers that are available. This will ensure the interface functions correctly. Drivers can be downloaded on the manufacturers website, and sometimes come on a disk in the box, although this is becoming increasingly uncommon.
Some recommend audio interfaces:
These may seem expensive considering you’re just starting out, however please bear in mind they are built to last. The sound quality these provide is great, and the construction will ensure it will continue to function, no matter how many knocks and bumps it takes.
Here at Inta Audio, we also have a special bundle, including a UR22 interface, microphone, headphones and upgrade to Cubase 9 Artist, all for £299. Cubase 9 Artist is the middle-tier DAW by Steinberg, and alone is worth £229. As the UR22 comes with Cubase AI in the box, this upgrade can be applied – all at a huge saving.
Monitors
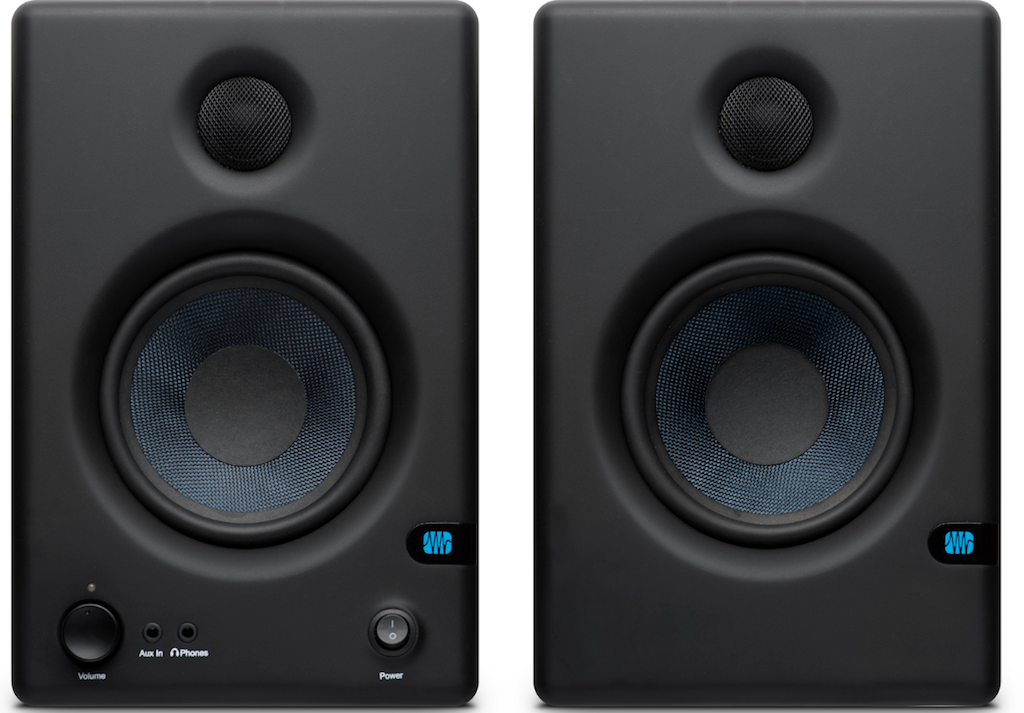
When recording, and especially mixing, you will want a good quality listening solution so you can hear every detail, with little to no colouration of the sound. What this means is you do not want headphones or monitors that have been ‘bass boosted’ for example, as this will give an inaccurate representation of what you’re listening too, which in turn will lead to poor mixing decisions.
Monitors offer the truest representation of your sound, however there are some things to consider. The shape of your room will determine the sound you actually hear, meaning you will experience peaks and dips in the frequency spectrum, requiring you to invest in proper acoustic treatment. There is software available to counter this problem, such as Sonarworks Reference 3. This software will analyse your room and eliminate any discrepancies, giving you a much desired flat frequency response. This software does require a good quality microphone for referencing, and acoustic treatment is still a good idea regardless.
You will also need to ensure you have enough room for the monitors to be placed in the correct position, and you may even need to purchase additional stands. Your monitors, depending on your room should face you at the same angle as each other, and you should try and situate your self directly in the middle, or ‘sweet spot’ as it’s more commonly known (see image below).
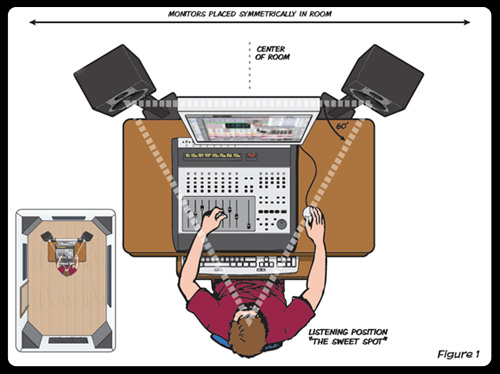
All of these points considered, you might be surprised to know that good quality monitors actually don’t cost that much anymore. Here are some recommendations:
There are cheaper alternatives, however under this sort of price point the sound quality just isn’t substantial enough to mix with.
Headphones
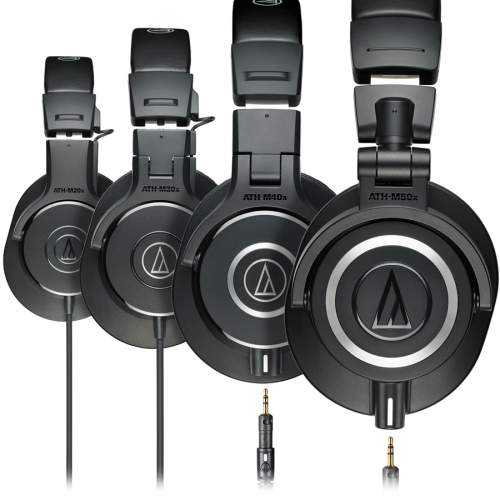
Headphones offer a different perspective on sound. To begin with, they are very useful for mixing on the go. They are also essential when you’re actually recording. When recording with a microphone you will want to hear yourself, however monitors will project the sound back into your microphone resulting in a messy and unusable recording. Using headphones will eliminate this problem as no sound is being projected back into the microphone.
The issue with headphones is that is gives an unrealistic representation of the sound – you’re hearing audio straight into your left of right ear. In the real world, sounds bounce and reflect off walls and objects, which monitors can represent naturally. Furthermore, no headphones have a true flat frequency response. Some come close, but it’s not perfect.
This can also lead to poor mixing choices, and sound under-par when played back on anything other than headphones. Sonarworks offers another plugin for headphones, which simulates a flat frequency response, similar to the monitor plugin. This will certainly improve the frequency issue, however there are only a select number of headphones compatible with this. Waves NX is a plugin that aims to simulate how sound behaves in a room, creating a sense of space that headphones alone can’t represent, which in turn will improve your mixing decisions.
As you’re just starting out with recording and mixing, headphones are probably the best choice as they are cheaper than monitors, and you can use them on the go. It is however it’s worth purchasing a pair of monitors later on down the line.
Here are some recommended headphones.
Microphones
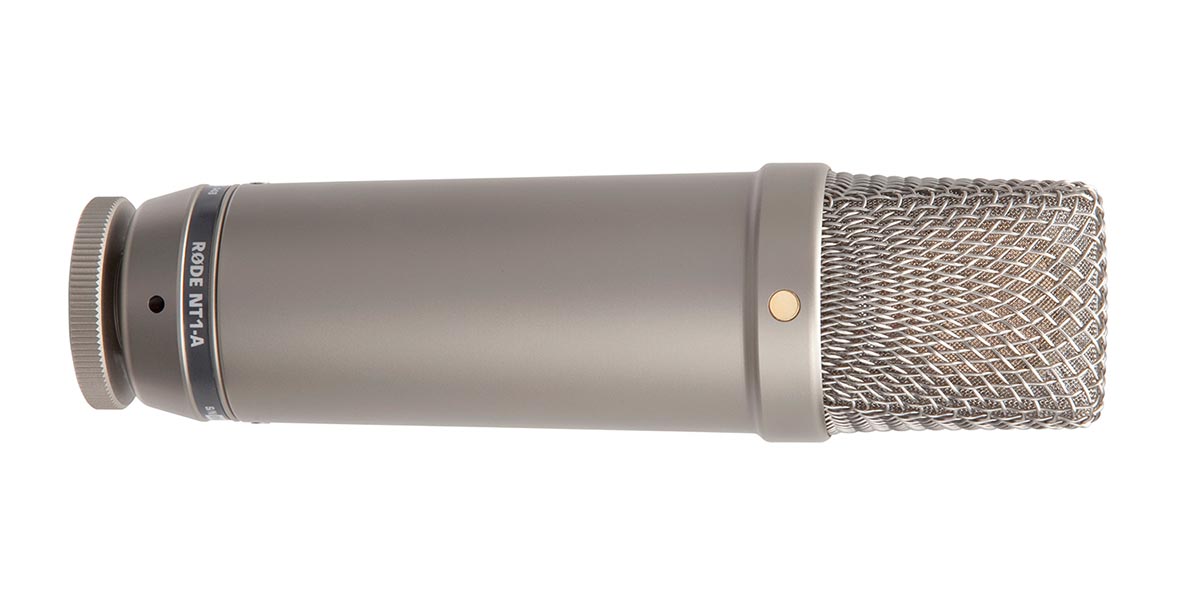
Microphones will allow you to record…anything! The difference in microphone comes down to intended use and sound properties.
A Quick Microphone Overview.
There are two main types of microphones.
Dynamic microphones are probably the most common. They are cheap, require no additional power to run when connected to your interface, and are more suited to ‘loud’ sounds and impacts, such as drums, guitars, and live events.
Condenser microphones offer much more clarity, and in general sound a lot cleaner, however they are susceptible to distortion on overly-loud sound sources, and cost a bit more than dynamic mics. They also require +48V phantom power to run. This comes as standard on most interfaces nowdays, however it’s always worth checking the specs beforehand. Without this on your interface, you won’t be able to use a condenser mic.
Condensers are great on just about anything, especially vocals and cymbals, but when paired with a dynamic mic, on a guitar cab for example, you can create some truly unique tones.
There are other types of microphones, such as ribbon microphones, however these are quite costly and are only really used in certain circumstances.
USB microphones are also available. These don’t require an interface, however the sound quality may not be up to par with the standard variant.
For starting out with home recording, it’s down to personal preference. USB microphones are a good option as you don’t need to invest in an interface right out, however it’s worth investing in an audio interface and XLR mic later on down the line if you need that extra sound quality.
Here are some recommendations:
- Samson C01U PRO – USB microphone – a great cheap all rounder – £61.95
- Samson Q7 – Dynamic microphone – good for guitars and drums £28.95
- Behringer C1 – condenser microphone – great on vocals, guitar and cymbals – £42.99
- Rode NT1A Vocal Kit– Condenser microphone – designed for vocals but a great all-rounder, and vocal accessories – £149
Leads / Cables
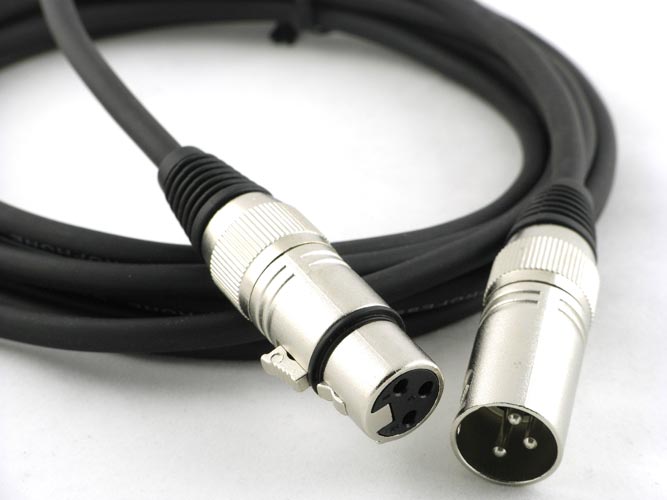
Now you’ve got to grips with all the equipment, you need to understand how they all connect together.
Your audio interface is the heart of the setup, and everything will be connected to that. Because of this, please research which inputs and outputs are included.
Microphones (excluding USB) will require an XLR cable to connect to the input of your interface. These can be identified by the 3 pins. You will need to ensure you purchase a male to female XLR, as there are a few variants.
When connecting a guitar straight into your interface, you will need a 1/4” jack to jack, which will also go in the input of your interface.
Please be aware that certain monitors and interfaces have different connections, so read the specs of each item and look at images of both to determine which lead you will need. Some interfaces offer XLR output, some offer jack. This also applies to monitors, although some offer both XLR and jack. As long as the lead is balanced, it doesn’t matter which one you use. There are also jack to XLR cables available when needed.
Balanced vs Unbalanced
Cables can be balanced or unbalanced. Your standard guitar lead is most likely unbalanced, which is fine for that purpose, however when it comes to recording and monitoring you ideally need balanced.
- Unbalanced – These cables carry a lot of unwanted noise down the signal, which is projected into your recording or out of your speakers. They can be identified by a single ring around the end of the connector, and are not suitable for monitoring.
- Balanced – These cables eliminate noise, resulting in clean input and playback. These can be identified by the two rings round the end of the connector, and should ideally be used instead of an unbalanced cable.
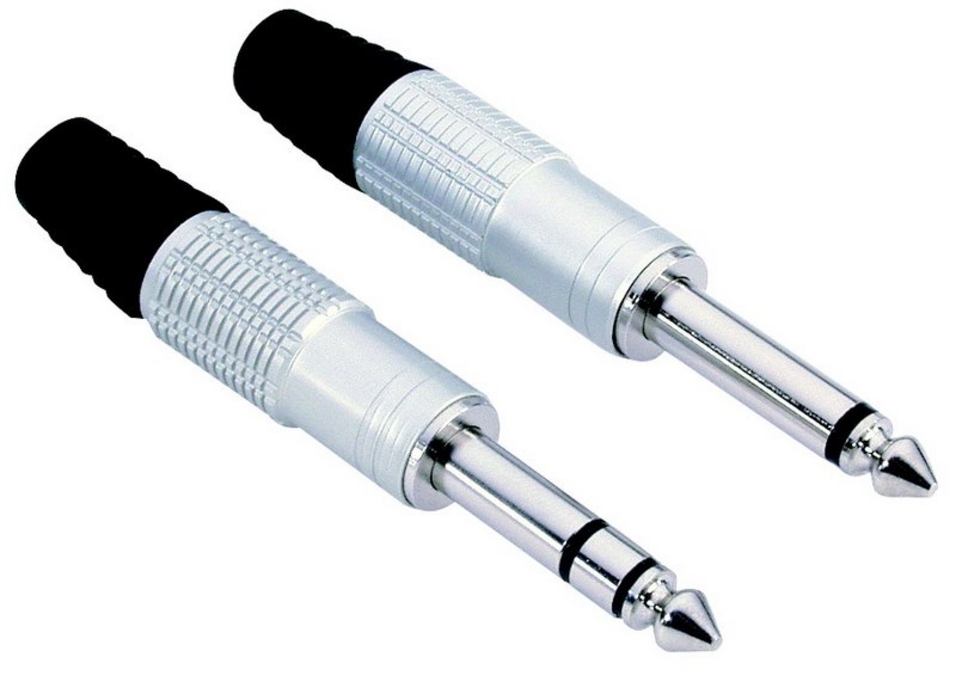
It’s also worth noting that balanced cables won’t function if the input is not balanced. You can check this by looking at the port – there is usually an indicator stating if it is balanced, however most monitors are.
Now you have an understanding of the basics of home recording. If you require any more help regarding this, please get in touch with us and we’ll help you out.
Our number – 02476 369898
Our email – cs@inta-audio.com
Follow us on: